Garden Potential with Coconut Coir Dust: A Beginner Guide
Why Coconut Coir Dust Is Your Garden New Best Friend
A Sustainable Alternative to Peat Moss
So, you’re looking to give your garden a little boost, maybe try something new with your soil. You’ve probably heard of peat moss, right? It’s been the go-to for ages. But here’s the thing: digging up peat bogs isn’t exactly great for the environment. Those bogs are important ecosystems, and it takes forever for them to grow back, if they ever really do. That’s where coconut coir dust comes in. It’s made from coconut husks, which are usually just a byproduct of the coconut industry. So, instead of throwing them away, we get this amazing soil amendment. It works a lot like peat moss, holding onto water and giving your plants a good home, but without messing with those delicate bog environments. It’s a win-win, really. You get great soil, and the planet gets a break.
The Magic of Coconut Coir Dust pH
Now, let’s talk about pH. It sounds a bit science-y, but it’s just a way to measure how acidic or alkaline your soil is. Most plants, especially the ones you’re probably growing for food or flowers, like soil that’s pretty neutral. Peat moss, the old standby, tends to be quite acidic. That means you often have to add things like lime to balance it out, which can be a bit of a hassle, especially if you’re just starting out. Coconut coir dust, on the other hand, has a much more balanced pH, usually sitting right around neutral. This makes your life a lot easier. You don’t have to worry as much about adjusting it, and your plants are more likely to be able to soak up all the good nutrients you’re giving them without any pH-related drama. It’s like starting with a perfectly tuned instrument instead of one that needs a lot of work.
Superior Water Retention and Rewetting
One of the biggest headaches for gardeners, especially beginners, is getting the watering right. Too much, and you get root rot. Too little, and your plants wilt. Coconut coir dust is a real champion when it comes to holding onto water. It acts like a sponge, soaking up moisture and then releasing it slowly to your plant’s roots as they need it. But here’s where it really shines compared to some other materials: if it does dry out completely, it’s much easier to rewet. You know how sometimes peat moss can get so dry it almost repels water? Coir doesn’t do that. It’s much more forgiving. This means less stress for you and happier, healthier plants, even if you forget to water for a day or two. It just makes managing moisture so much simpler.
Getting Started with Coconut Coir Dust
What is Coconut Coir Dust?
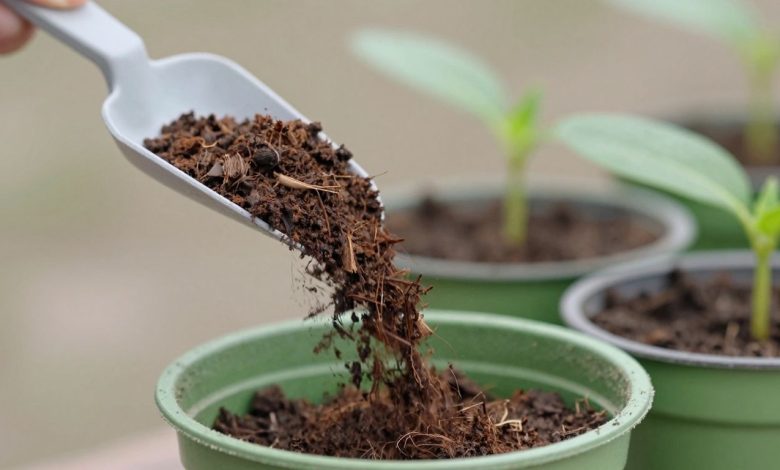
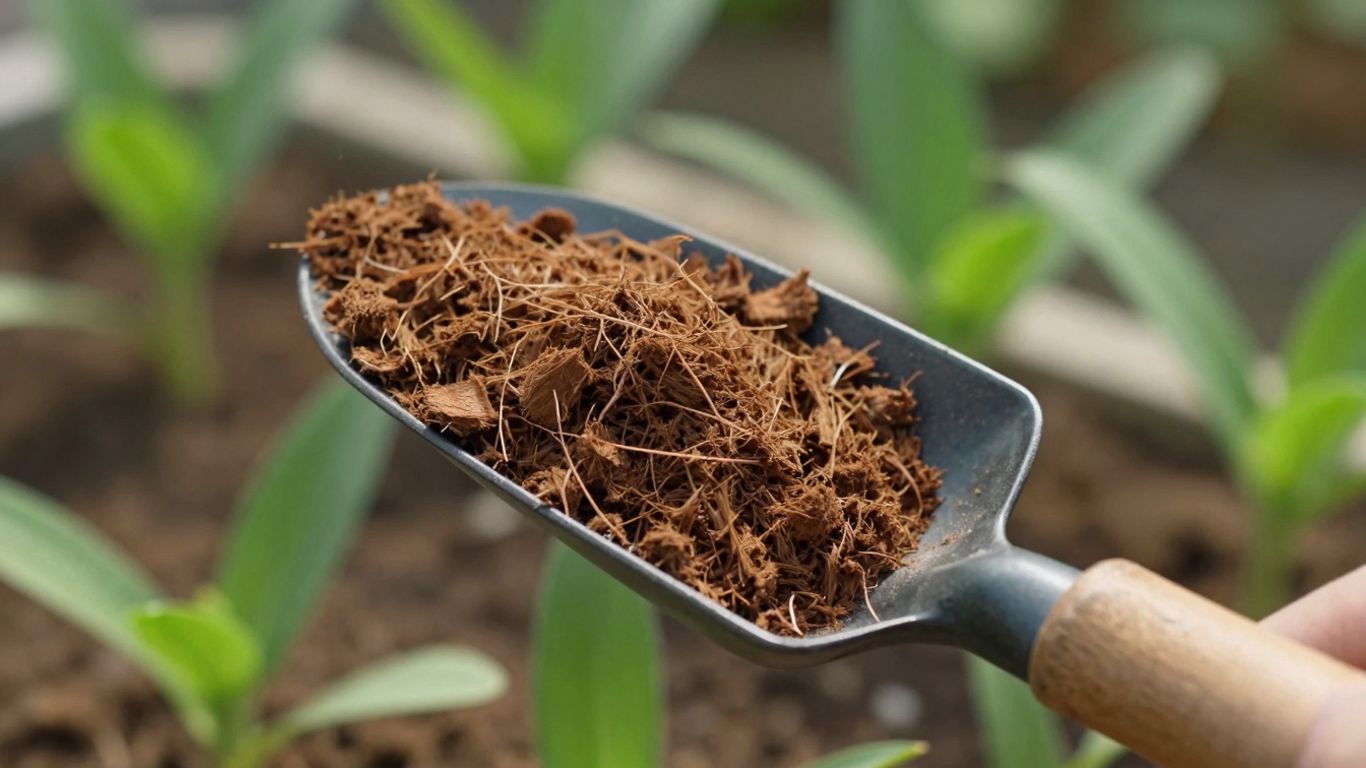
So, what exactly is this stuff? Coconut coir dust, often called cocopeat, comes from the husk of coconuts. It’s a byproduct of the coconut industry, which is pretty neat because it means we’re using something that would otherwise be waste. You’ll usually find it sold as a compressed cocopeat block or cocopeat brick. When you add water to these blocks, they expand a lot, turning into a fluffy, soil-like material. It’s got a great texture for plants, kind of like peat moss but with some key differences that make it a bit easier to work with, especially for beginners. It holds onto water really well, but also lets air get to your plant’s roots, which is super important.
Where to Find Coconut Coir Dust
You can find cocopeat in most garden centers and nurseries. It’s becoming really popular, so it’s not hard to track down. Online retailers are also a great source, and you can often get a better deal if you buy a larger cocopeat block. Just make sure you’re buying from a reputable seller to get good quality stuff. Sometimes it’s sold loose, but the compressed cocopeat brick or block form is the most common and easiest to store.
Understanding Coconut Coir Dust Packaging
When you buy coconut coir dust, it usually comes in a compressed form, like a cocopeat brick or a larger cocopeat block. This is done to save space during shipping. You’ll see the size of the compressed block and then an estimate of how much expanded material you’ll get from it. For example, a small brick might say it yields 1 cubic foot of potting mix. It’s important to check this so you know how much you’re actually getting. Some packaging might also mention the pH level or if it’s been buffered, which is good to know, but for most beginner mixes, the standard stuff is perfectly fine.
The Perfect Potting Mix Recipe
Your Base: Coconut Coir Dust
Alright, let’s talk about building your potting mix from the ground up. The star of our show is coconut coir dust, often called coco coir. Think of it as the main ingredient that gives your soil its structure and holds onto moisture. It’s a fantastic alternative to peat moss, and honestly, it’s a bit easier to work with for beginners because its pH is usually in a good spot for most plants right out of the bag. This means you won’t have to fuss as much with adjusting it. It’s great at soaking up water, which is exactly what you want when you’re potting up your plants.
Adding Aeration with Perlite or Vermiculite
Now, just using coco coir alone would make your soil a bit too dense, like a wet sponge that never dries out. That’s where perlite and vermiculite come in. Perlite looks like little white Styrofoam balls, and it’s super light. It creates air pockets in your soil, letting your plant roots breathe and preventing water from sitting around too long. Vermiculite is different; it’s more like flaky mica. It also helps with air, but it’s really good at holding onto water and nutrients, kind of like a buffer. For a good all-around mix, a 50/50 blend of perlite and vermiculite works wonders. It gives you the best of both worlds – good drainage and some moisture retention.
Boosting Nutrients with Compost or Worm Castings
Coco Coir Block, perlite, and vermiculite are great for structure and water management, but they don’t offer much in the way of food for your plants. That’s where compost or worm castings come in. Compost is basically decomposed organic material, and it’s packed with nutrients that release slowly over time. It also adds beneficial microbes to your soil. Worm castings, which are literally worm poop, are like a superfood for your plants. They’re loaded with readily available nutrients and are very gentle, so you don’t have to worry as much about burning your plants. Either one will give your potting mix that nutrient boost your plants need to thrive.
Mixing Your Own Soil Blend
Gathering Your Essential Tools
Alright, let’s get down to business and mix up some fantastic soil for your plants. It’s not as complicated as it sounds, and honestly, it’s kind of satisfying. First things first, you’ll need a few things to make this process smooth. Grab a big tarp or a clean plastic tub – a kiddie pool works surprisingly well for this. You’ll also want a sturdy shovel or a good hand trowel for mixing. Don’t forget a pair of gardening gloves; your hands will thank you later. For measuring, having some buckets or containers handy is a good idea, maybe a 5-gallon bucket if you want to think in ‘parts’. And finally, a watering can or a spray bottle will be useful for getting the moisture just right.
The Simple Proportions for Success
Now, for the good stuff: what goes into your perfect soil blend. For a mix that works for pretty much anything you want to grow, especially in pots or containers, aim for a simple ratio. Think of it as one part base, one part aeration, and one part nutrients. So, start with one part coco coir dust. Then, add one part of something for aeration, like perlite or vermiculite, or a mix of both. Finally, toss in one part of good quality compost or worm castings for all those yummy nutrients your plants crave. If you’re using coco coir, you’re usually in a pretty good spot pH-wise, but if you ever decide to mix in some peat moss, a little bit of dolomite lime can help balance things out. Just a tablespoon per gallon of peat moss is usually plenty.
Step-by-Step Mixing Guide
Okay, let’s put it all together. Spread out your tarp or get your tub ready. Pour in your coco coir dust. If it’s one of those compressed bricks, break it up and fluff it out as much as you can. Next, add your perlite and/or vermiculite right on top. Then, spread your compost or worm castings over everything. If you’re adding that bit of dolomite lime, sprinkle it in now. Now comes the fun part: mixing. Use your shovel or trowel, or even your gloved hands, to really get in there and combine everything. Keep turning it over and over until it all looks like one uniform, fluffy mix. You don’t want any big clumps of just one ingredient. Once it’s all mixed up, give it a light misting with water. You want it to be damp, like a wrung-out sponge, not soggy. This helps keep the dust down and makes it easier to handle when you’re filling your pots.
Balancing Your Soil’s Needs
The Role of pH and Why It Matters
So, you’ve got your coconut coir dust, maybe some perlite, and a bit of compost. Awesome! But before you just shove it all in a pot and call it a day, let’s chat about something called pH. Think of it like the soil’s personality. It’s a scale that tells you how acidic or alkaline your soil is, and it’s a pretty big deal for your plants. Most common garden plants, like your tomatoes, peppers, and even those pretty flowers, are happiest when the pH is somewhere between 6.0 and 7.0. This is the sweet spot where they can actually grab all the good nutrients you’re giving them. If the pH is way off, it’s like having a buffet in front of your plants, but they can’t reach the food. They might be surrounded by goodness, but they’ll still go hungry. You can get a basic idea of your soil’s pH with a simple test kit, which is way better than just guessing.
When to Add Dolomite Lime
Now, about that pH. If your soil test shows that your mix is leaning too acidic (that means a lower pH number), you might need to add something to bring it back up. This is where dolomite lime comes in. It’s not just about adding lime; dolomite lime also brings calcium and magnesium, which are important for plant health. You don’t need a ton of it, and it’s best to add it gradually. If you’re using coconut coir dust, it tends to be a bit on the acidic side to begin with, so adding a little lime is often a good idea, especially if you’re growing plants that don’t like super acidic conditions. Always follow the recommendations from your soil test or start with a small amount and see how your plants react. Too much lime can swing the pH too far the other way, causing its own set of problems.
Ensuring Proper Drainage is Key
We’ve talked about how coconut coir dust is great at holding water, which is mostly a good thing. But, and this is a big ‘but’, you don’t want your soil to turn into a soggy swamp. Plant roots need air just as much as they need water. If the soil stays wet for too long, the roots can’t breathe, and they can start to rot. This is why adding things like perlite or vermiculite is so important. They create little air pockets in your soil mix, allowing water to drain away while still keeping enough moisture available for your plants. When you’re mixing your soil, think about how the water will flow through it. If you pour water on top, does it soak in reasonably quickly, or does it just sit there? If it sits, you need more drainage material. Good drainage means healthier roots and happier plants, plain and simple.
Coconut Coir Dust for Different Garden Styles
Ideal for Container Gardens
So, you’re thinking about growing in pots? Whether it’s a few herbs on your windowsill or a whole patio full of veggies, container gardening is awesome. But here’s the thing: you can’t just scoop dirt from your backyard into a pot. Seriously, don’t do it. Garden soil gets way too packed down in a container, and your plant roots will basically suffocate. That’s where coco coir dust shines. It’s super light and airy, which is exactly what plants in pots need. It helps keep things from getting waterlogged, which is a common problem when you’re dealing with limited space. Mixing your own potting soil with coco coir as a base means you’re giving your container plants the best chance to thrive, without all the fuss of soil that’s too heavy.
Perfect for Raised Beds
Raised beds are like a blank canvas for your garden soil. You get to build the perfect mix from the ground up, and coco coir dust is a fantastic ingredient to have in your toolkit. Because you’re creating the soil environment yourself, you have total control. This means you can easily create a blend that drains well and provides good aeration, which is key for healthy roots. Using coco coir in your raised bed mix helps ensure that your soil stays loose and workable, making it easier for plants to establish themselves and grow strong. Plus, raised beds tend to warm up a bit faster in the spring, giving your plants a nice head start.
Great for Indoor and Balcony Gardens
Gardening doesn’t always happen in a big backyard. If you’re working with limited space, like a balcony or an indoor setup, coco coir dust is your friend. These smaller growing environments often need soil that’s lightweight and drains well, and coco coir fits the bill perfectly. It’s a great alternative to peat moss, especially if you’re trying to be more eco-conscious. You can create a custom soil blend that’s just right for your indoor plants or balcony containers, giving them the airy, well-draining medium they need to flourish, even when space is tight.
Common Beginner Soil Mistakes to Avoid

Don’t Use Garden Soil Directly
Okay, so you’ve got this great idea to start a garden, maybe even indoors, and you’re thinking, “I’ll just grab some dirt from the backyard!” Please, resist that urge. Soil from your actual garden, the stuff outside, is usually way too dense for containers. It packs down hard, like, really hard, which suffocates plant roots. Plus, it can bring along unwanted guests like pests, diseases, or even weed seeds. It’s just not built for the controlled environment of a pot or a raised bed. You’re setting yourself up for a struggle right from the start.
Keep Your Soil Mix Simple
I know, I know, there are a million things you can add to soil. You see fancy bags of amendments everywhere, and it’s easy to get overwhelmed. But here’s a secret: for beginners, simple is best. Start with the basics – your coco coir, maybe some perlite, and a bit of compost. Get comfortable with how those work together. Once you’ve got a few successful plants under your belt, then you can start experimenting with other things. Trying to do too much too soon can just lead to confusion and, frankly, sad plants.
Never Forget About Drainage
This one is huge. If your pots don’t have holes, or if they sit in a saucer full of water all the time, your plants are going to drown. Roots need air, and if they’re constantly waterlogged, they’ll start to rot. It’s a fast track to plant death. Always, always, always make sure your soil mix drains well and that your containers have a way for excess water to escape. It’s non-negotiable.
Beware of Over-Fertilizing
It’s tempting to think that if a little fertilizer is good, a lot must be amazing, right? Wrong. Giving your plants too much food can actually burn their delicate roots. It’s like eating way too much Thanksgiving dinner – you feel sick. Start with a good, nutrient-rich soil mix, and if you decide to add extra fertilizer, do it sparingly. Follow the package directions, or even use a bit less to start. You can always add more later if your plants seem to need it, but you can’t take it away once it’s in there.
Troubleshooting Your Coconut Coir Dust Mix
Dealing with Compaction Issues
Sometimes, even with the best intentions, your coco coir mix can get a bit too dense. This usually happens if you’ve packed it down too much when filling pots, or if the coir itself was really compressed to begin with. When soil gets too compacted, it’s hard for air and water to get to your plant’s roots. If you notice your soil feels like a brick and water just sits on top, it’s probably too compacted. The fix is usually pretty simple. You can gently loosen the top layer of soil with a fork or a small trowel. For bigger issues, you might need to carefully dig up the plant and mix in some more perlite or vermiculite to fluff things up. Next time, try to be a bit lighter when you’re filling your pots, and make sure you’re breaking up any big chunks of coir before you mix it.
Addressing Water Retention Problems
Coco coir is known for holding onto water, which is usually a good thing. But what if your soil seems to be drying out way too fast, or on the flip side, staying soggy for days? If it’s drying out too quickly, it might mean you didn’t use enough coir in your mix, or perhaps you’re in a really hot, dry climate and need to water more often. Adding a bit more compost can also help hold moisture. On the other hand, if it’s staying wet for too long, that’s a drainage issue. You might have too much coir relative to your aeration materials like perlite. You could try mixing in more perlite or vermiculite, or even some coarse sand if you have it. It’s all about finding that sweet spot where the soil is moist but not waterlogged.
Nutrient Deficiencies and Solutions
Coco coir itself doesn’t have a lot of nutrients, which is why we add compost or worm castings. If your plants are looking a bit sad – maybe yellowing leaves or slow growth – it could be a sign they’re not getting enough food. This is where your compost or worm castings come in. If you’ve already added them, maybe you need to add a bit more next time you mix up a batch. For a quick boost, you can use a balanced liquid fertilizer, but be careful not to overdo it, especially with young plants. Always follow the instructions on the fertilizer package. Remember, coco coir can also sometimes lock up nutrients if the pH is off, so checking your soil’s pH is always a good idea if you suspect nutrient problems.
The Environmental Benefits of Coconut Coir Dust
A Renewable Resource
So, you’re thinking about using Coconut Coir Dust in your garden? That’s awesome! One of the really cool things about it is that it’s made from coconut husks. Think about it – coconuts are grown all over the world, and the husks are usually just a byproduct. Instead of letting them go to waste, we can use them to make this fantastic gardening material. It’s a way to use something that’s already being produced, which is way better than digging up peat bogs, you know?
Reducing Reliance on Peat Bogs
Speaking of peat bogs, they’re actually pretty important ecosystems. They store a lot of carbon, and when we dig them up for peat moss, we release that carbon into the atmosphere. Plus, peat bogs take a super long time to form. By choosing Coconut Coir Dust, you’re helping to cut down on the demand for peat moss. This means those delicate bog environments can be left alone, which is a win for the planet. It’s a simple switch you can make in your garden that has a ripple effect.
Supporting Sustainable Gardening Practices
Using Coconut Coir Dust is a really straightforward way to make your gardening habits a bit more eco-friendly. It’s a material that comes from a renewable source, and it helps reduce waste. When you mix up your potting soil with coir, you’re not just giving your plants a great home; you’re also making a choice that’s kinder to the environment. It feels good to know that your garden can be both beautiful and responsible, right?
So, What’s the Takeaway?
Alright, so we’ve talked a lot about coco coir dust. It’s pretty neat stuff, right? It holds water well, gives your plant roots some breathing room, and it’s a good choice if you’re trying to be a bit more eco-friendly. You can mix it into your own soil blends, use it for starting seeds, or even just add it to your existing garden beds. Don’t overthink it too much – start simple, see how your plants respond, and adjust as you go. Happy gardening!
team’s contact:
WhatsApp (+62)812 1233 3590 (Ms.Maria)
Email [email protected]